In the previous article[1], I have investigated modern PKI software alternatives. One of the options on the list was HashiCorp Vault. The natural next step is to set up a Vault PKI.
This article documents setting up an imaginary multi-tenant Vault PKI with custom PEM bundles generated with OpenSSL. The steps the following:
- create a root CA with OpenSSL
- create intermediate CAs for imaginary clients with OpenSSL
- using HashiCorp Vault in development mode:
- import custom bundle with root and intermediate certificates
- configure Vault roles
- issue a certificate
The method for generating the root and intermediate CAs comes from OpenSSL Certificate Authority guide written by Jamie Nguyen[2]. I’m including the scripts and the configuration in this article for reference.
§The result
As an outcome of this article, the reader will be able to create a new root CA and add new intermediate CAs to existing root CAs with a single command. This command will also prepare the Vault PEM bundle. With the Vault bundle and four more shell commands, the user will have a ready to use certificate with a CA chain. The process will be:
- run
init-intermediate.sh <ca-name> <client-id>to have an intermediate CA - enable PKI for the new client with
vaultshell command - import a PEM bundle with
vaultshell command - add a permission with
vaultshell command - issue a certificate with
vaultshell command
§Create a root CA
I’m going to start by creating an environment file which will contain a location for the CA and distinguished name settings. As the root of the CA, I’m going to use ~/.ca directory.
|
|
Now, I will create the environment file, ~/.ca/.article-ca:
|
|
The next step is to create a shell program responsible for writing the CA root configuration. This, and the following intermediate, are by far the two longest bits of code in this article.
|
|
After saving the program as ~/.ca/init-ca.sh, making it executable with chmod +x ~/.ca/init-ca.sh and running as ~/.ca/init-ca.sh article-ca, the new CA has been created in ~/.ca/article-ca. Using this method and changing the CA name given to the program as the first argument, more root CAs can be created.
The program will ask three times for the CA private key passphrase: to create the key, to verify and to use the key. Next, it will ask to confirm default values for the distinguished name. When all values are confirmed and correct, the CA root certificate will be generated.
The output will be similar to:
Generating RSA private key, 4096 bit long modulus
..........................++
...........................................................................................................................................................................................++
e is 65537 (0x10001)
Enter pass phrase for /Users/rad/.ca/article-ca/private/ca.key.pem:
Verifying - Enter pass phrase for /Users/rad/.ca/article-ca/private/ca.key.pem:
Enter pass phrase for /Users/rad/.ca/article-ca/private/ca.key.pem:
You are about to be asked to enter information that will be incorporated
into your certificate request.
What you are about to enter is what is called a Distinguished Name or a DN.
There are quite a few fields but you can leave some blank
For some fields there will be a default value,
If you enter '.', the field will be left blank.
-----
Country Name (2 letter code) [DE]:
State or Province Name [NRW]:
Locality Name [Herzogenrath]:
Organization Name [klarrio.com]:
Organizational Unit Name [gmbh]:
Common Name []:
Email Address [radek.gruchalski@klarrio.com]:
Certificate:
    Data:
        Version: 3 (0x2)
        Serial Number: 14292483172117400839 (0xc65919b8604e4d07)
    Signature Algorithm: sha256WithRSAEncryption
        Issuer: C=DE, ST=NRW, L=Herzogenrath, O=klarrio.com, OU=gmbh/emailAddress=radek.gruchalski@klarrio.com
        Validity
            Not Before: Sep  8 20:53:48 2020 GMT
            Not After : Sep  8 20:53:48 2021 GMT
        Subject: C=DE, ST=NRW, L=Herzogenrath, O=klarrio.com, OU=gmbh/emailAddress=radek.gruchalski@klarrio.com
        Subject Public Key Info:
            Public Key Algorithm: rsaEncryption
                Public-Key: (4096 bit)
                Modulus:
                    00:ab:bf:02:ef:72:b3:ce:ac:4b:37:01:1b:57:fc:
                    ...
                    0d:84:73:28:32:e8:f1:99:64:ee:f5:b2:6f:21:7f:
                    9e:08:21
                Exponent: 65537 (0x10001)
        X509v3 extensions:
            X509v3 Subject Key Identifier:
                06:DE:59:CD:9A:21:9F:A0:B2:32:EE:B3:E6:89:11:10:9C:6E:83:0F
            X509v3 Authority Key Identifier:
                keyid:06:DE:59:CD:9A:21:9F:A0:B2:32:EE:B3:E6:89:11:10:9C:6E:83:0F

            X509v3 Basic Constraints: critical
                CA:TRUE
            X509v3 Key Usage: critical
                Digital Signature, Certificate Sign, CRL Sign
    Signature Algorithm: sha256WithRSAEncryption
         35:30:29:2c:39:1b:57:81:d8:95:9a:26:1f:5c:44:62:65:ca:
         ...
         fe:28:53:b1:76:63:22:cd
on disk, there should be:
|
|
§Create an intermediate CA
The intermediate CA reuses the environment file of the root CA. The program to create it is very similar to the init-ca.sh.
|
|
After saving as ~/.ca/init-intermediate.sh, making executable with chmod +x ~/.ca/init-intermediate.sh, it can be executed. I’m going to create two intermediate CAs immediately. In my case, mirroring the imaginary use case for setting up Keycloak with multiple clients[3], I have:
- ClientA
~/.ca/init-intermediate.sh article-ca client-a - ClientB
~/.ca/init-intermediate.sh article-ca client-b
In each case, the program will ask the following:
- the intermediate CA key password, three times: to create the key, verify the password and use the key
- verify to confirm distinguished name defaults, additionally a common name
- root CA key password during intermediate signing
- a couple of confirmations
- once again a passphrase of the intermediate CA key for pkcs1 conversion
After these two commands are finished, the files on disk look similar to:
[rad] ~ $ tree ~/.ca/article-ca/
/Users/rad/.ca/article-ca/
├── certs
│   └── ca.cert.pem
├── crl
├── index.txt
├── index.txt.attr
├── index.txt.attr.old
├── index.txt.old
├── intermediate
│   ├── client-a
│   │   ├── certs
│   │   │   └── intermediate.cert.pem
│   │   ├── chain
│   │   │   └── ca-chain.cert.pem
│   │   ├── crl
│   │   ├── crlnumber
│   │   ├── csr
│   │   │   └── intermediate.csr.pem
│   │   ├── index.txt
│   │   ├── newcerts
│   │   ├── openssl.cnf
│   │   ├── private
│   │   │   └── intermediate.key.pem
│   │   ├── serial
│   │   └── vault-bundle
│   │       └── bundle.pem
│   └── client-b
│       ├── certs
│       │   └── intermediate.cert.pem
│       ├── chain
│       │   └── ca-chain.cert.pem
│       ├── crl
│       ├── crlnumber
│       ├── csr
│       │   └── intermediate.csr.pem
│       ├── index.txt
│       ├── newcerts
│       ├── openssl.cnf
│       ├── private
│       │   └── intermediate.key.pem
│       ├── serial
│       └── vault-bundle
│           └── bundle.pem
├── newcerts
│   ├── 1000.pem
│   └── 1001.pem
├── openssl.cnf
├── private
│   └── ca.key.pem
├── serial
└── serial.old

21 directories, 29 files
The output of the intermediate CA init, for one of the executions, is similar to:
Generating RSA private key, 4096 bit long modulus
...........................................++
.....................................................................................................................................................................................................................................................................................++
e is 65537 (0x10001)
Enter pass phrase for /Users/rad/.ca/article-ca/intermediate/client-a/private/intermediate.key.pem:
Verifying - Enter pass phrase for /Users/rad/.ca/article-ca/intermediate/client-a/private/intermediate.key.pem:
Enter pass phrase for /Users/rad/.ca/article-ca/intermediate/client-a/private/intermediate.key.pem:
You are about to be asked to enter information that will be incorporated
into your certificate request.
What you are about to enter is what is called a Distinguished Name or a DN.
There are quite a few fields but you can leave some blank
For some fields there will be a default value,
If you enter '.', the field will be left blank.
-----
Country Name (2 letter code) [DE]:
State or Province Name [NRW]:
Locality Name [Herzogenrath]:
Organization Name [klarrio.com]:
Organizational Unit Name [gmbh]:
Common Name [client-a.gmbh.klarrio.com]:
Email Address [radek.gruchalski@klarrio.com]:
Using configuration from /Users/rad/.ca/article-ca/openssl.cnf
Enter pass phrase for /Users/rad/.ca/article-ca/private/ca.key.pem:
Check that the request matches the signature
Signature ok
Certificate Details:
        Serial Number: 4096 (0x1000)
        Validity
            Not Before: Sep  8 21:05:08 2020 GMT
            Not After : Sep  8 21:05:08 2021 GMT
        Subject:
            countryName               = DE
            stateOrProvinceName       = NRW
            organizationName          = klarrio.com
            organizationalUnitName    = gmbh
            commonName                = client-a.gmbh.klarrio.com
            emailAddress              = radek.gruchalski@klarrio.com
        X509v3 extensions:
            X509v3 Subject Key Identifier:
                47:7D:8A:9E:DC:23:03:7A:AA:E4:79:A8:98:EE:40:54:01:84:1C:E8
            X509v3 Authority Key Identifier:
                keyid:06:DE:59:CD:9A:21:9F:A0:B2:32:EE:B3:E6:89:11:10:9C:6E:83:0F

            X509v3 Basic Constraints: critical
                CA:TRUE, pathlen:0
            X509v3 Key Usage: critical
                Digital Signature, Certificate Sign, CRL Sign
Certificate is to be certified until Sep  8 21:05:08 2021 GMT (365 days)
Sign the certificate? [y/n]:y


1 out of 1 certificate requests certified, commit? [y/n]y
Write out database with 1 new entries
Data Base Updated
Certificate:
    Data:
        Version: 3 (0x2)
        Serial Number: 4096 (0x1000)
    Signature Algorithm: sha256WithRSAEncryption
        Issuer: C=DE, ST=NRW, L=Herzogenrath, O=klarrio.com, OU=gmbh/emailAddress=radek.gruchalski@klarrio.com
        Validity
            Not Before: Sep  9 21:05:08 2020 GMT
            Not After : Sep  9 21:05:08 2021 GMT
        Subject: C=DE, ST=NRW, O=klarrio.com, OU=gmbh, CN=client-a.gmbh.klarrio.com/emailAddress=radek.gruchalski@klarrio.com
        Subject Public Key Info:
            Public Key Algorithm: rsaEncryption
                Public-Key: (4096 bit)
                Modulus:
                    00:aa:c3:eb:7e:c4:2a:79:2e:bc:7b:6f:c2:61:f9:
                    ...
                    80:27:da:c6:b8:ff:20:3b:7f:9b:fd:ff:15:d0:2c:
                    e7:2b:03
                Exponent: 65537 (0x10001)
        X509v3 extensions:
            X509v3 Subject Key Identifier:
                47:7D:8A:9E:DC:23:03:7A:AA:E4:79:A8:98:EE:40:54:01:84:1C:E8
            X509v3 Authority Key Identifier:
                keyid:06:DE:59:CD:9A:21:9F:A0:B2:32:EE:B3:E6:89:11:10:9C:6E:83:0F

            X509v3 Basic Constraints: critical
                CA:TRUE, pathlen:0
            X509v3 Key Usage: critical
                Digital Signature, Certificate Sign, CRL Sign
    Signature Algorithm: sha256WithRSAEncryption
         22:b5:e3:6e:a5:d6:0d:6b:30:65:a3:d9:68:27:38:2b:ea:64:
         ...
         39:ac:c3:66:88:8c:f0:eb
/Users/rad/.ca/article-ca/intermediate/client-a/certs/intermediate.cert.pem: OK
Enter pass phrase for /Users/rad/.ca/article-ca/intermediate/client-a/private/intermediate.key.pem:
writing RSA key
At this stage, I have a root CA and two intermediate CA for respective common names:
- ClientA:
client-a.gmbh.klarrio.com - ClientB:
client-b.gmbh.klarrio.com
For every intermediate, I have a PEM bundle ready to be imported to HashiCorp Vault.
§Start Vault in development mode
I’m going to use Vault development mode, with VAULT_DEV_ROOT_TOKEN_ID hard coded and default port 8200 exposed so it can be reached from localhost.
|
|
Now, in another terminal window, I am going to export the token and Vault address environment variables:
|
|
Finally, I can enable PKIs:
|
|
I can see Vault confirming:
2020-09-08T21:11:32.133Z [INFO]  core: successful mount: namespace= path=client-a/ type=pki
2020-09-08T21:11:32.914Z [INFO]  core: successful mount: namespace= path=client-b/ type=pki
§Importing the bundles
The next step is to import the PEM bundles, they were prepared during the intermediate CA creation:
|
|
|
|
§Notes to the examples above
- By setting
allow_bare_domainstotrue, I allow the user to generate a certificate for any literal domain specified inallowed_domains, so the user can issue a certificate forclient-[X].gmbh.klarrio.com. - By setting
allow_localhosttotrue, I allow issuing a certificate forlocalhost, useful for testing. - By setting
allow_subdomainstotrue, I give the user the ability to issue certificates with common names that are subdomains ofallowed_domains.
All the interesting options are documented in the Vault documentation[4].
§Requesting certificates
To request a certificate, simply issue the following command:
|
|
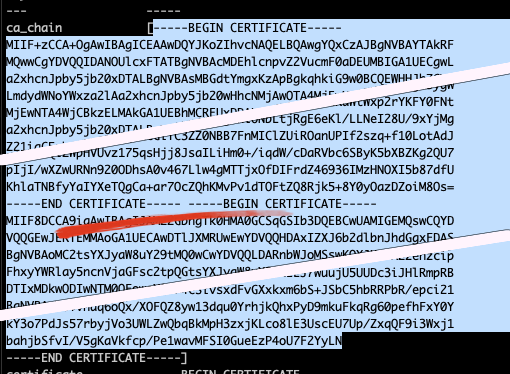
To which the output is … pretty verbose …:
Key                 Value
---                 -----
ca_chain            [-----BEGIN CERTIFICATE-----
MIIF+zCCA+OgAwIBAgICEAAwDQYJKoZIhvcNAQELBQAwgYQxCzAJBgNVBAYTAkRF
MQwwCgYDVQQIDANOUlcxFTATBgNVBAcMDEhlcnpvZ2VucmF0aDEUMBIGA1UECgwL
...
KhlaTNBfyYaIYXeTQgCa+ar7OcZQhKMvPv1dTOFtZQ8Rjk5+8Y0yOazDZoiM8Os=
-----END CERTIFICATE----- -----BEGIN CERTIFICATE-----
MIIF8DCCA9igAwIBAgIJAMZZGbhgTk0HMA0GCSqGSIb3DQEBCwUAMIGEMQswCQYD
...
kY3o7PdJs57rbyjVo3UWLZwQbqBkMpH3zxjKLco8lE3UscEU7Up/ZxqQF9i3Wxj1
bahjbSfvI/V5gKaVkfcp/Pe1wavMFSI0GueEzP4oU7F2YyLN
-----END CERTIFICATE-----]
certificate         -----BEGIN CERTIFICATE-----
MIIE8TCCAtmgAwIBAgIUZWaMXolFNt/ufzgUOnvu79ZCVjEwDQYJKoZIhvcNAQEL
BQAwgZMxCzAJBgNVBAYTAkRFMQwwCgYDVQQIDANOUlcxFDASBgNVBAoMC2tsYXJy
...
nJOv5KyaSz8OCKdX+JlVmU9Qoapj4EyXOZQ+LS8RBsFXrbjpjqxdd3kpiEhpcQwN
7UXijzXX25gZKwFPTof+VdAKa5M1/uU9G15KwL4S/vJwYGwL/zo799qrGdd/+plV
cOd4GA883CW0DdC8QuU2+w3HIRS6
-----END CERTIFICATE-----
expiration          1600616181
issuing_ca          -----BEGIN CERTIFICATE-----
MIIF+zCCA+OgAwIBAgICEAAwDQYJKoZIhvcNAQELBQAwgYQxCzAJBgNVBAYTAkRF
MQwwCgYDVQQIDANOUlcxFTATBgNVBAcMDEhlcnpvZ2VucmF0aDEUMBIGA1UECgwL
a2xhcnJpby5jb20xDTALBgNVBAsMBGdtYmgxKzApBgkqhkiG9w0BCQEWHHJhZGVr
...
pIjI/wXZwURNn920ODhsA0v467Llw4gMTTjxOfDIFrdZ46936IMzHNOXI5b87dfU
KhlaTNBfyYaIYXeTQgCa+ar7OcZQhKMvPv1dTOFtZQ8Rjk5+8Y0yOazDZoiM8Os=
-----END CERTIFICATE-----
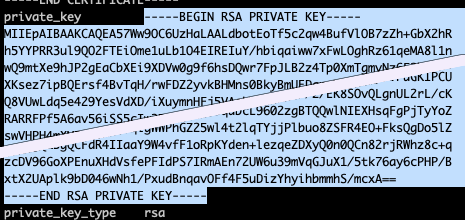
private_key         -----BEGIN RSA PRIVATE KEY-----
MIIEpAIBAAKCAQEA57Ww9OC6UzHaLAALdbotEoTf5c2qw4BufVlOB7zZh+GbX2hR
...
zcDV96GoXPEnuXHdVsfePFIdPS7IRmAEn72UW6u39mVqGJuX1/5tk76ay6cPHP/B
xtX2UAplk9bD046wNh1/PxudBnqavOFf4F5uDizYhyihbmmhS/mcxA==
-----END RSA PRIVATE KEY-----
private_key_type    rsa
serial_number       65:66:8c:5e:89:45:36:df:ee:7f:38:14:3a:7b:ee:ef:d6:42:56:31
Cool, we have the certificate, a private key and a certificate chain. The CA chain can now be copied to chain.pem file.

Pay attention to the -----END CERTIFICATE----- -----BEGIN CERTIFICATE----- bit. It needs to be saved as:
...
-----END CERTIFICATE-----
-----BEGIN CERTIFICATE-----
...
Copy the certificate to certificate.pem:

And the private to key.pem:

A server with TLS transport can now be created using the chain.pem, certificate.pem and key.pem files.
§Why is this cool
- It’s not possible to request certificates for domain names not in
allowed_domains:
|
|
- It’s possible to provide alt names:
|
|
- Certificates generated for
ClientAdo not validate forClientBand vice versa - different intermediate - It is very easy to define a policy with different criteria. For example: to allow a user of
ClientBto generate a certificate for specific domain only:
|
|
so that it’s possible to:
|
|
but not:
|
|
§Conclusion
Once the initial setting up of the program to create the CAs is finished, the rest of the process is straightforward. Adding new clients (intermediates) is fairly easy. Configuring Vault is not a big job. Vault PKI is a solid choice for a multi-tenant PKI solution.
Of course, there are still some challenges left on the table. Mainly storing the root and intermediate certificates safely and properly ensuring who can access them.