As the number of applications and websites in the organization grows, the developer will inevitably receive a request to implement Single Sign-On. Single Sign-On (SSO for short) is an authentication scheme allowing the user to log in with a single set of credentials and share the session across multiple, independent, potentially unrelated systems.
The savvy developer will roll out Keycloak, enable Standard Flow client, maybe enable some of the social login options, like GitHub, Google or Facebook and call it a day. The users will be happy. When they go to any of the internet properties requiring signing in, if they are not signed in, they will be redirected to Keycloak login page. Once they log in, they receive a token, with which they can use to access any other property requiring login.
As a bonus, the SSO usually introduces a Single Log-Out (SLO). By invalidating the access token, the user is logged out of all the properties relying on that token.
table of contents
§setting up the scene
But what if the complexity of the system goes one step further? For example, the user of the properties is a Member of the Support Team and the property in question is a support system where, for example, the Support Team member can view and manage some data on behalf of a Customer. The company has many Customers and many Support Team Members. Maybe some of the Support Team Members are dedicated to certain Customers? When they sign in to the Support System, they should only see and be able to act, on behalf of only those selected, dedicated Customers.
The first thought of any seasoned developer would most likely be to create a new database and store a mapping between the Support Team Member user and the Customer. The Support Application would then query the new database and only display the Customers for which the mappings exist. And that’s fine, there is nothing wrong with approach. However, that’s another database to maintain. Someone has to create the rules of which Member supports which Customer. This knowledge has to be stored somewhere and someone has to build an application to ensure the data in the new database is always up to date and relevant.
An alternative approach would be to use Keycloak for storing, managing and retrieval of all of this knowledge. If we consider Keycloak to be a single source of truth across the organization, we remove quite a lot of complexity.
So, further in this article, I am showing a proof of concept of Keycloak as a mechanism to allow Support Team Members to access selected Customers only, without any other database. This will also present how to use Keycloak Authorization Services in real-world scenario and give the reader a glimpse into User Managed Access (UMA).
I have described how to start a local development version of Keycloak. Examples here will build on top of the previous write up. [1]
§the goal
The outcome of this article is to have a Keycloak realm with an OpenID client configured so that a program can be created to query Keycloak for users’ entitlements and discover all available entitlements of a given type by leveraging Keycloak token and resource set endpoints.
We will configure a realm with required roles and set up Authorization Services resources, policies, scopes and permissions for two different access levels: a regular user, Service Team Member, and a supervisor, the user who is entitled to see all available resources, regardless of the role membership.
Without any further due, let’s start!
§add a realm
Open the browser, go to http://localhost:28080/auth/admin/master/console/, sign in as admin:admin.
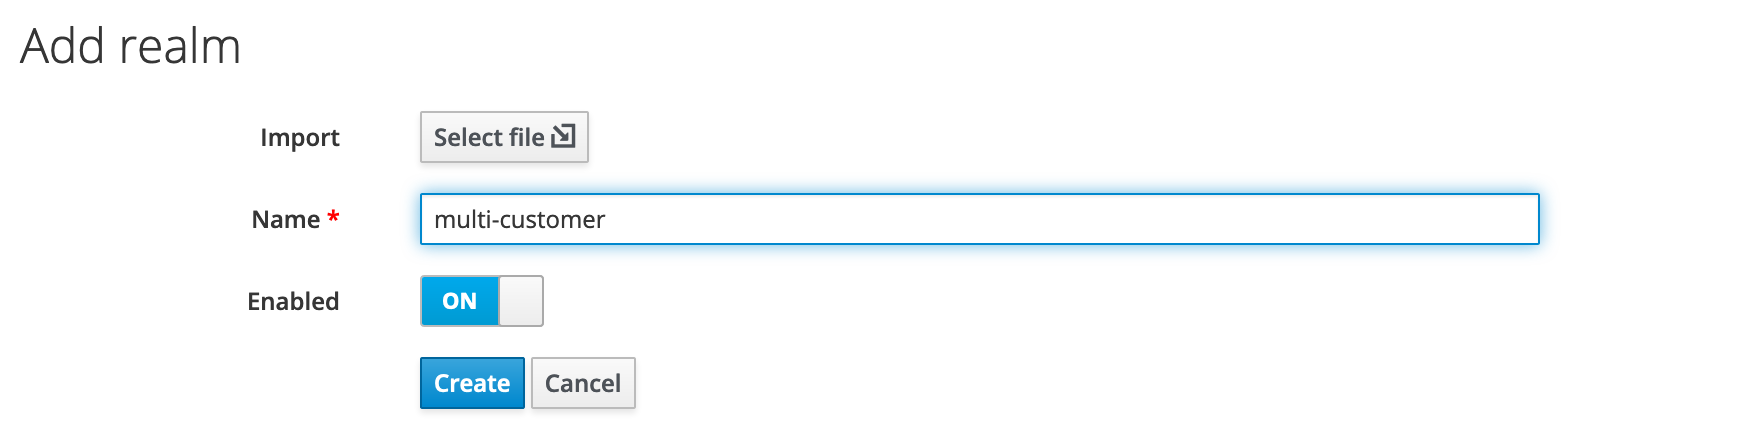
By default, we are signed in to the Master realm. So the first thing to do, is to create a new realm. In the top left corner, under the Keycloak logo, hover over Master or Select realm text. A menu will appear, there is the Add realm button. Click the button and on the form that shows up, type multi-customer in the Name field.
The realm is our disposable proving ground. All the users, roles and everything we will do further, resides inside. Deleting a realm, deletes all users and settings.
§configure roles
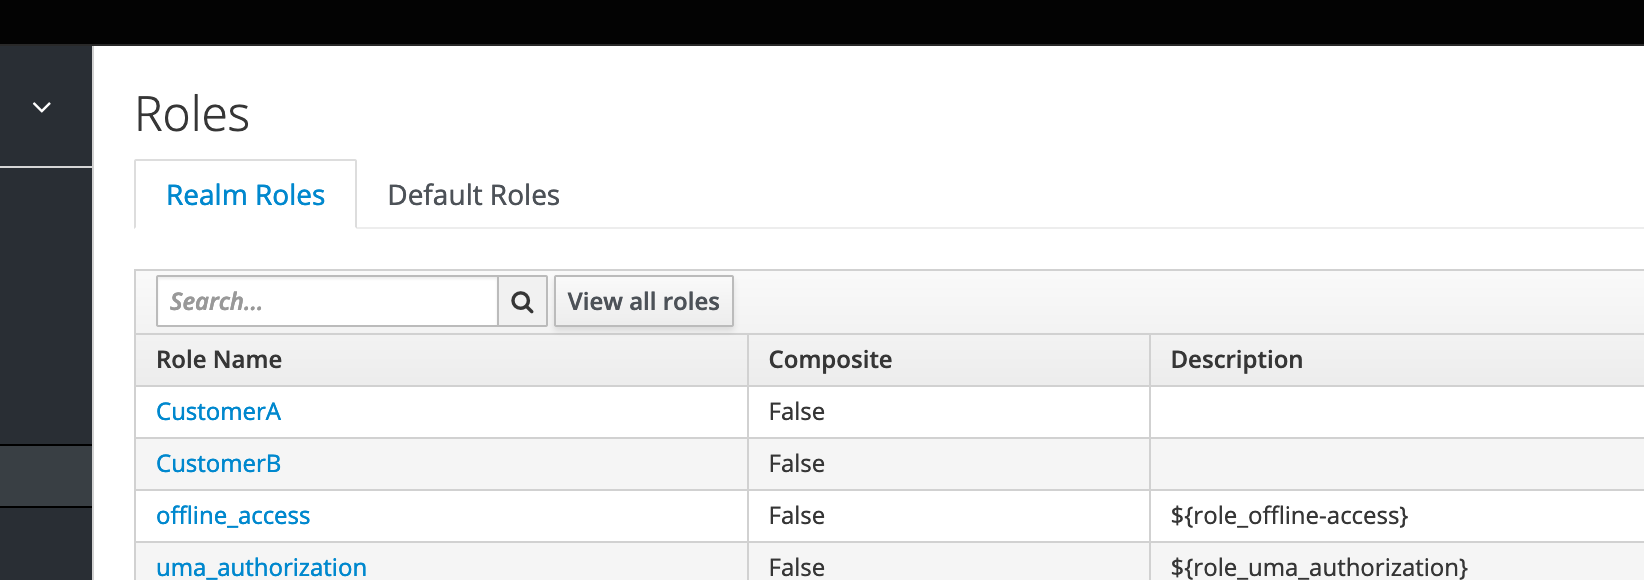
We will represent our imaginary Customers as roles. We have to add a role for every Customer. In the left menu, find and click Roles. Create a role for every customer, for the sake of this article, I’ll go with:
CustomerACustomerB
§the OpenID Client
Now, we have to create an OpenID Client. Client is what allows the users of our application securely exchanging client id and secret for an access token. Click Clients in the left menu. On the page that opens, find the Create button near the top of the right corner of the page, click it.
Type customers as a Client ID. Leave Client Protocol as openid-connect and put http://localhost:28080 as Root URL. Click Save. The page will reload and a bunch of other settings will become available.
§settings tab
Set them as follows:
Access Type:confidentialStandard Flow Enabled:offImplicit Flow enabled:offDirect Grants Enabled:onAuthorization Enabled:on- this will enable
Service Accounts
- this will enable
- URLs are pre-populated and good for what we need to do
- Click Save
- the
Authorizationtab will appear
- the
§scope tab
Great, now go to Scope tab.
Full Scope Allowed:off
Realm Roles will appear. Select all Available Roles and click Add selected button.
§authorization tab
This is where things get a little bit involved. A bunch of new tabs have appeared.
§authorization / settings
Policy Enforcement Mode:EnforcingDecision Strategy:UnanimousRemote Resource Management:off
Click Save.
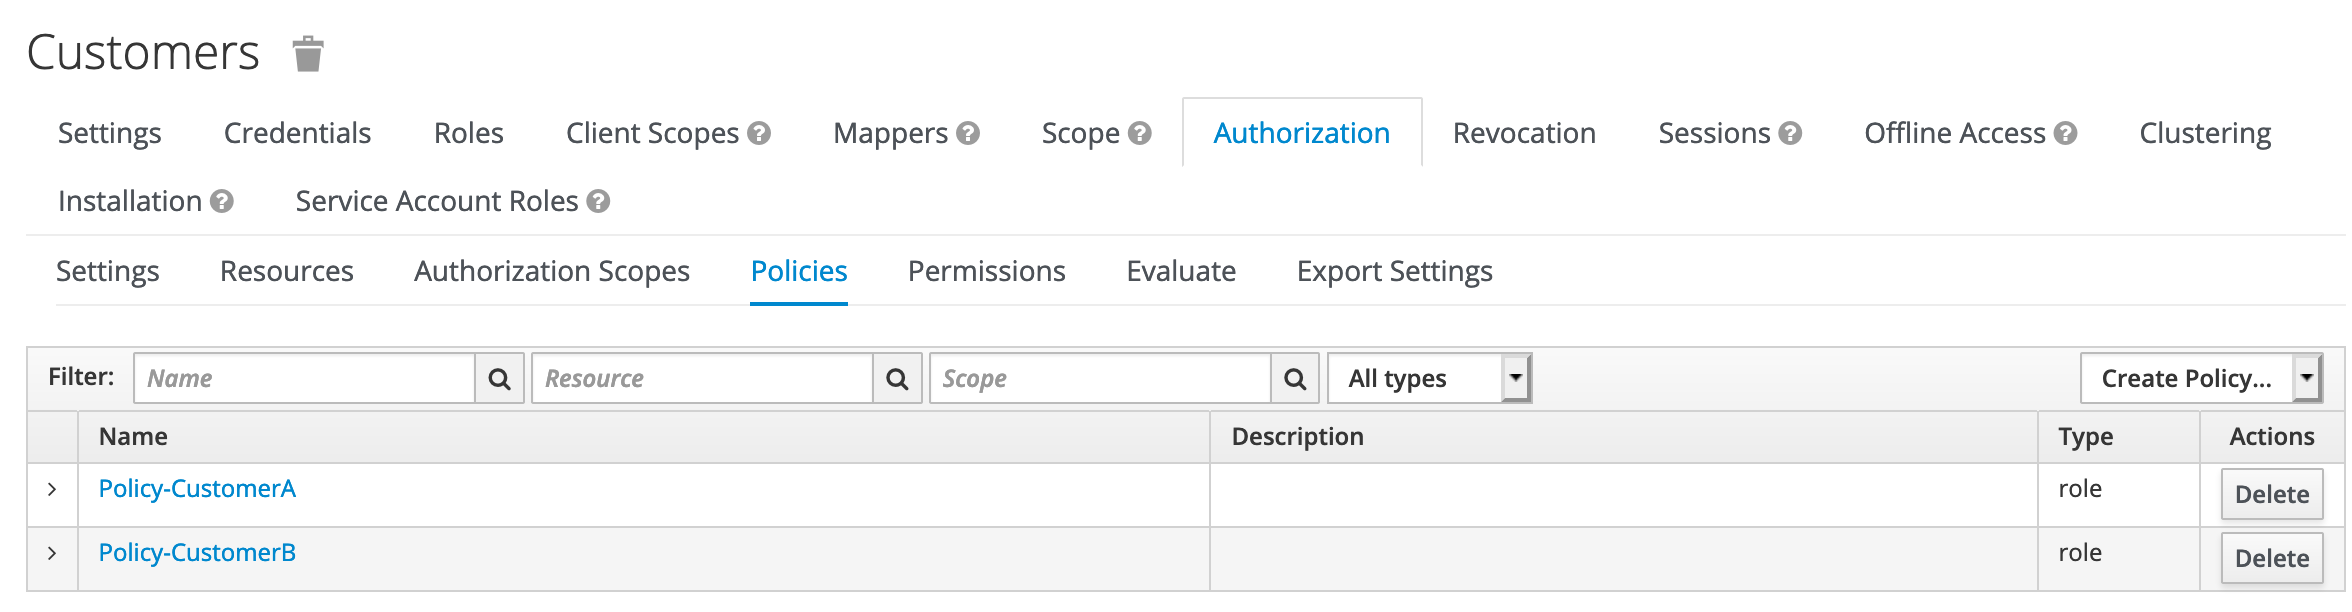
§authorization / policies
- delete
Default Policy - For each Customer, create a
Role basedpolicy (dropdown on the right side of the page):CustomerA:Name:Policy-CustomerARealm Roles: type and select:CustomerA(clickRequiredLogic:Positive
CustomerB:Name:Policy-CustomerBRealm Roles: type and select:CustomerB(clickRequired)Logic:Positive
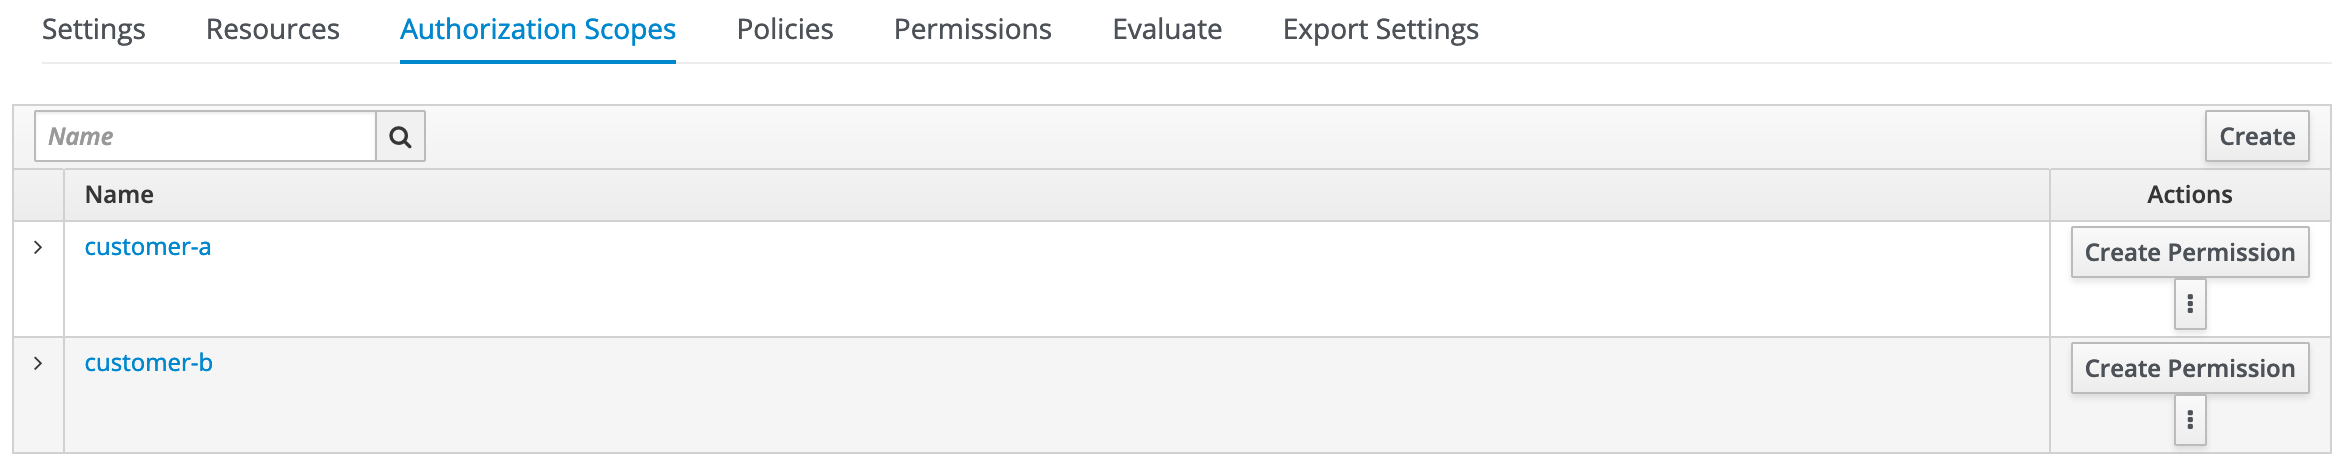
§authorization / authorization scopes
Create a scope for each customer:
- for
CustomerA:customer-a - for
CustomerB:customer-b
§authorization / resources
- delete
Default Resource

Create a resource for each customer:
CustomerA:Name:CustomerADisplay Name:Customer A ResourceType:urn:customers:resources:customerURI:/customers/CustomerA(irrelevant for our use case)Scope:customer-aUser Managed Access:off
CustomerB:Name:CustomerBDisplay Name:Customer B ResourceType:urn:customers:resources:customerURI:/customers/CustomerB(irrelevant for our use case)Scope:customer-bUser Managed Access:off

§authorization / permissions
Finally, create permissions. One Scope-Based permission per customer. As with policies, the option to add is on the right side of the screen, a dropdown.
CustomerA:Name:CustomerA PermissionResource:CustomerAScope:customer-aApply policy:Select Existing Policy:Policy-CustomerADecision strategy:Unanimous
CustomerB:Name:CustomerB PermissionResource:CustomerBScope:customer-bApply policy:Select Existing Policy:Policy-CustomerBDecision strategy:Unanimous

We have finished setting up Authorization services.
Before we can play around, we will add our Support Team Member user to Keycloak.
§create a user
In the left Keycloak menu, click Users. On the right hand side of the Lookup header, there is an Add user button. Click it. Populate the fields as follows:
Username:member@service-teamEmail:member@service-teamFirst name:MemberLast name:ServiceTeamUser enabled:onEmail verified:on
Click Save.
§user credentials
We are going to be interacting with Keycloak via command line only and the purpose of this exercise is to validate specific user’s resource access. Hence, we need to set the password for the user because we will use Resource owner credentials grant Section 4.3.
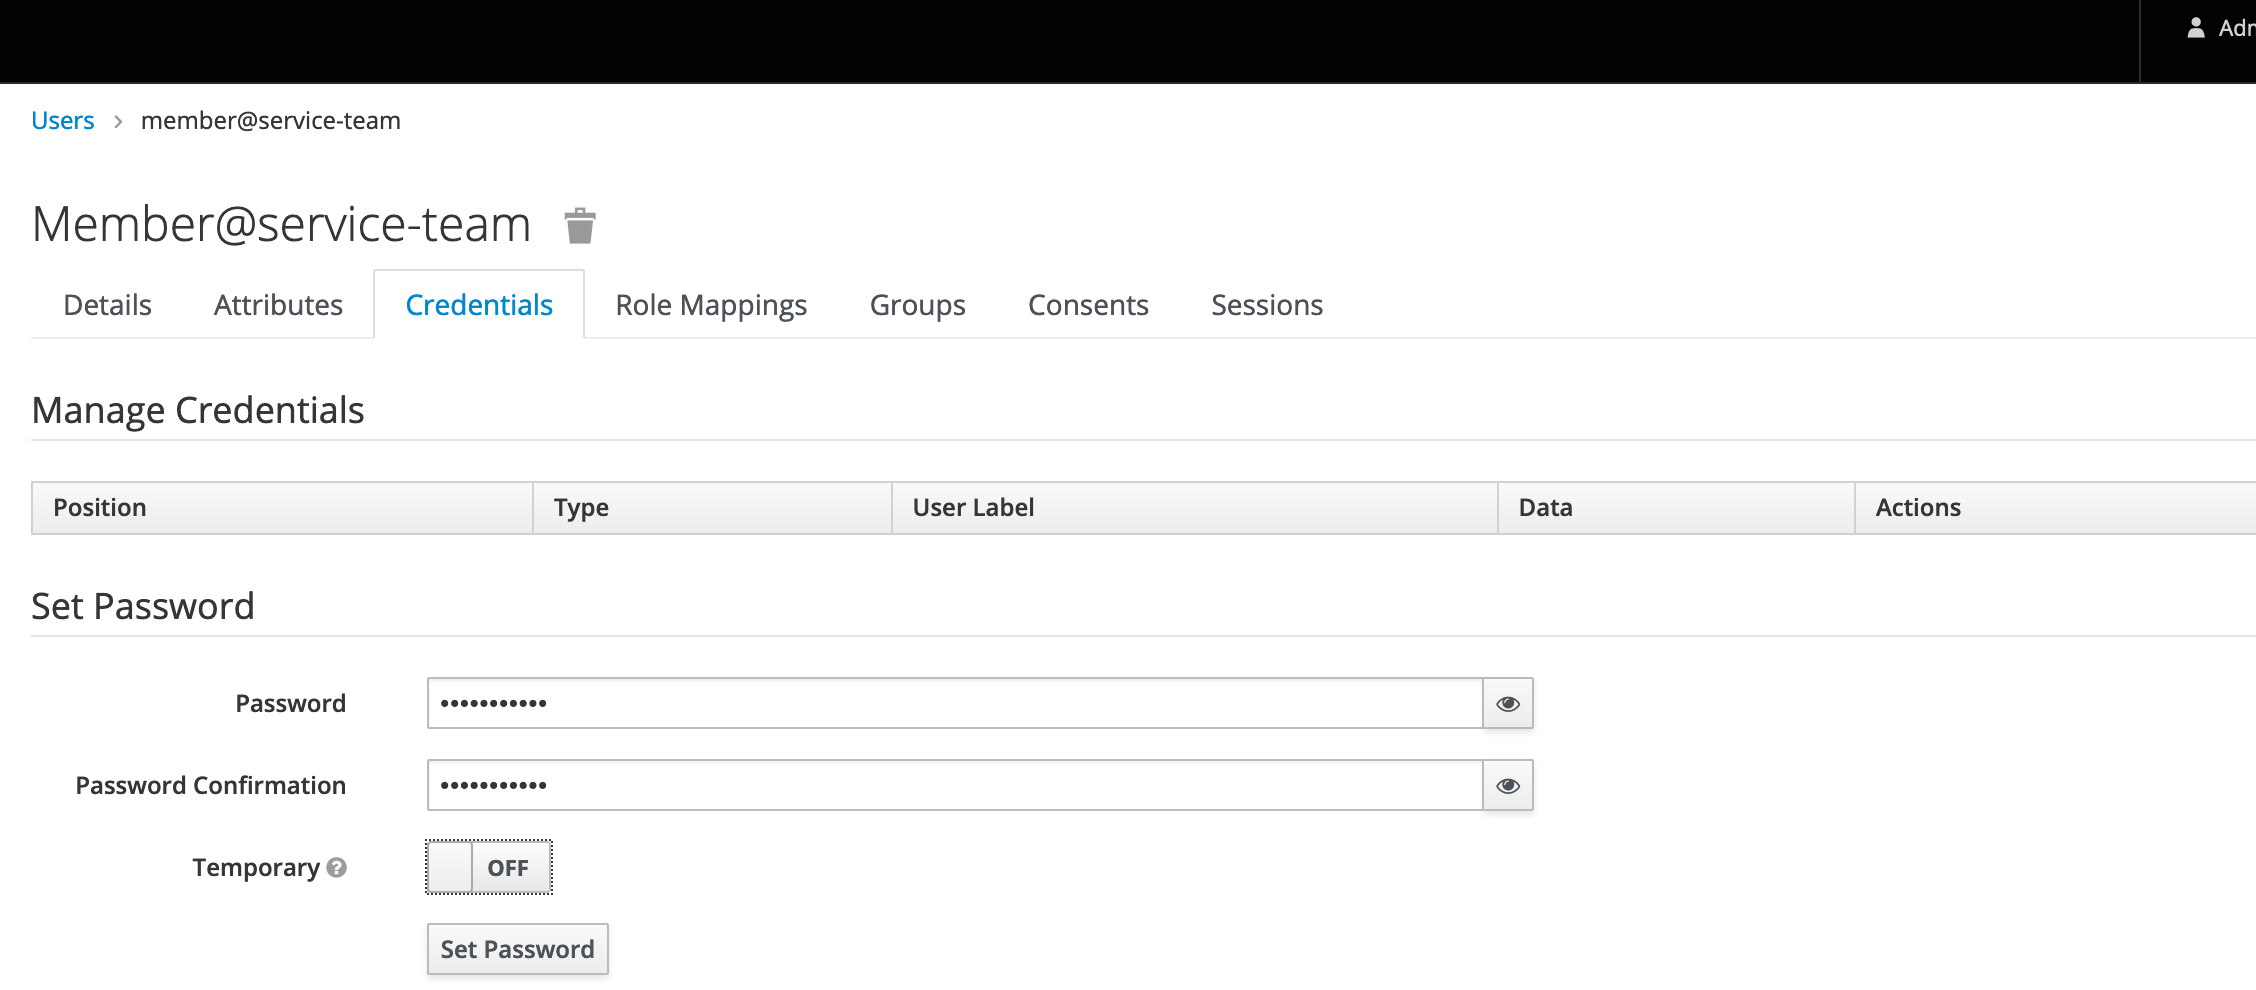
Set password:password123Temporary:off
Click Set password.
§fetch the OpenID Client credentials
Once again, in the left Keycloak menu, click Clients. Find customers client and click on it. Go to Credentials tab. Your client id is the client name—customers. The secret is displayed. Copy it and in the terminal, export as:
|
|
Also, export the username and password.
This is obviously done only for the sake of this tutorial. Don’t export passwords or secrets like this in a production system. Really, never. Use something like Ansible Vault or HashiCorp Vault to store secrets.
Even storing the password in the file and using:
|
|
would be better than what we do below. But now…
|
|
§play time!
If you receive an
Invalid bearer tokenerror at any step further, you need to obtain a new access token. It simply means the token has expired.
Whoa, that was a lot of stuff to set up! The good news, all that can be easily automated. But it was important to execute this once manually to see what goes where. As we have done it, we are ready for some real action!
In the same terminal window where we exported the secret and user password, let’s export the token URL so the examples below are a little bit more concise.
|
|
You can introspect your realm by going to
http://localhost:28080/auth/realms/multi-customer/.well-known/openid-configuration/.
Keep in mind, we haven’t assigned any roles to member@service-team user yet, other than what’s the default for Keycloak: offline_access and uma_authorization.
Let’s see if we can obtain an access token:
|
|
The outcome should be similar to this:
|
|
We will always need the value of the access token so further, we will export the access token as an environment variables directly from curl output using jq.
Okay, let’s get another token then…
|
|
§UMA tickets
From Wikipedia:
UMA stands for User Managed Access and is an OAuth based access management protocol standard.
It enables a resource owner to control the authorization of data sharing and other protected-resource access made between online services on the owner’s behalf or with the owner’s authorization by an autonomous requesting party. [2]
We can now ask Keycloak to tell us which resources the user has access to.
In order to do so, we have to ask for an UMA token by sending a post request to the realm token endpoint with our existing access token and a special grant type: urn:ietf:params:oauth:grant-type:uma-ticket.
The audience parameter is required.
|
|
We receive the response:
|
|
I know it does not look like it but this is a Great News!
The reason why we have received this answer is because we have removed the Default Resource and not assigned any customer roles to our user. Let’s change that.
Go to the user roles (Manage / Users (left menu in Keycloak) / member@service-team / Role Mappings) and assign CustomerA role.
Obtain another access token:
|
|
and rerun the previous command:
|
|
The response is different! Better! We can look at what we are interested in:
|
|
Copy the access_token from this response and decode it in jwt.io (or any other tool, it’s just three different base64 encoded strings concatenated with a dot). Look at realm_access and authorization claims. They are like this:
|
|
This response tells us that the user behind the Bearer token is allowed access to CustomerA using customer-a scope. The realm_access.roles claim contains the CustomerA role but we get that info in a regular access token already.
However, there is no CustomerB on this list.
Fair enough, let’s ask th server Keycloak directly if this user has access to CustomerB:
|
|
The response is:
|
|
Correct! The user does not have access to the CustomerB. What if we don’t specify a scope?
|
|
The response is:
|
|
Correct again! But let’s verify that this indeed works for CustomerA, the user should have access:
|
|
We receive:
|
|
Which is correct. Can the user request CustomerA resource with incorrect scope?
|
|
|
|
Correct, the resource does not exist with this scope! So let’s use the correct scope again, just to make sure everything is fine:
|
|
Once again, we get:
|
|
Phew. So far so good. Now, go to the user Role Mappings and assign CustomerB role. The user now has offline_access, uma_authorization, CustomerA and CustomerB roles assigned.
We require a new token:
|
|
Do we now have the permission to access CustomerB? Well, let’s find out:
|
|
Gives us:
|
|
And with the scope?
|
|
|
|
Cool! Everything works. Our regular user can now see all customers he has been given access to.
§top secret customer
Eventually, we may decide that we should be able to discover all customer resources available in our Keycloak resource server. What would be unfortunate though, if our regular user could see customers who they should never be aware of.
Frankly speaking, we could have a TopSecretCustomer in the system and nobody, ever, except of the TopSecretCustomer (and us) should be aware of their existence.
Keycloak offers something called a resource set. Resource set allows us to introspect resources available on our resource server.
In order to access the resource set, the user must have the uma_protection role of the client assigned. Which is great. This implies we can just create a dedicated user with access to the resource set. Separation of concern at work! …
Let’s do so.
§listing available customers
Go to Manage / Users and click Add user once again. Set the following:
Username:supervisor@companyEmail:supervisor@companyFirst name:SupervisorLast name:CompanyUser enabledandEmail verified:on
Click Save.
Set the password. Go to Credentials tab and set the password to password123!, Temporary: off. Click Set password. Now, go to Role Mappings and in the Client Roles, select customers client. Select uma_protection from Available roles and click Add selected.
On the command line, we can now list our customers. First, more environment variables to export.
|
|
As with well known OpenID configuration, you can introspect well known UMA configuration by going to
http://localhost:28080/auth/realms/multi-customer/.well-known/uma2-configuration/
We need an access token for the supervisor user:
|
|
The token received above is technically a protection API token (PAT). PAT is a special OAuth2 access token with a scope defined as uma_protection. [3]
We can query for available customers like this:
|
|
|
|
The above request queried the resource set with the type filter set to urn:customers:resources:customer.
More about querying the resource set in Keycloak Authorization Services Guide, Managing Resources.
Let’s check if our filter is working:
|
|
|
|
It is working! Let’s focus on the first response:
|
|
We can query each individual resource:
|
|
Gives us:
|
|
and:
|
|
results in:
|
|
We could now easily create an application to find and return all available Customers. All with Keycloak and without querying any database directly.
§conclusion
Keycloak is a very versatile tool and can be easily used as a single source of truth for authentication, single sign-on and authorization within an organization. This article only touches a tip of an iceberg but it presents to the reader a real-world, useful scenario of using Keycloak as a driver for multi-tenant single sign-on.